How to Create a Fillable PDF Form for Free
Learn how to create a fillable PDF form for free with no software to install. A step-by-step guide to adding text fields, checkboxes and signatures in-browser.
 Aleksandar Jovanovic 8 min read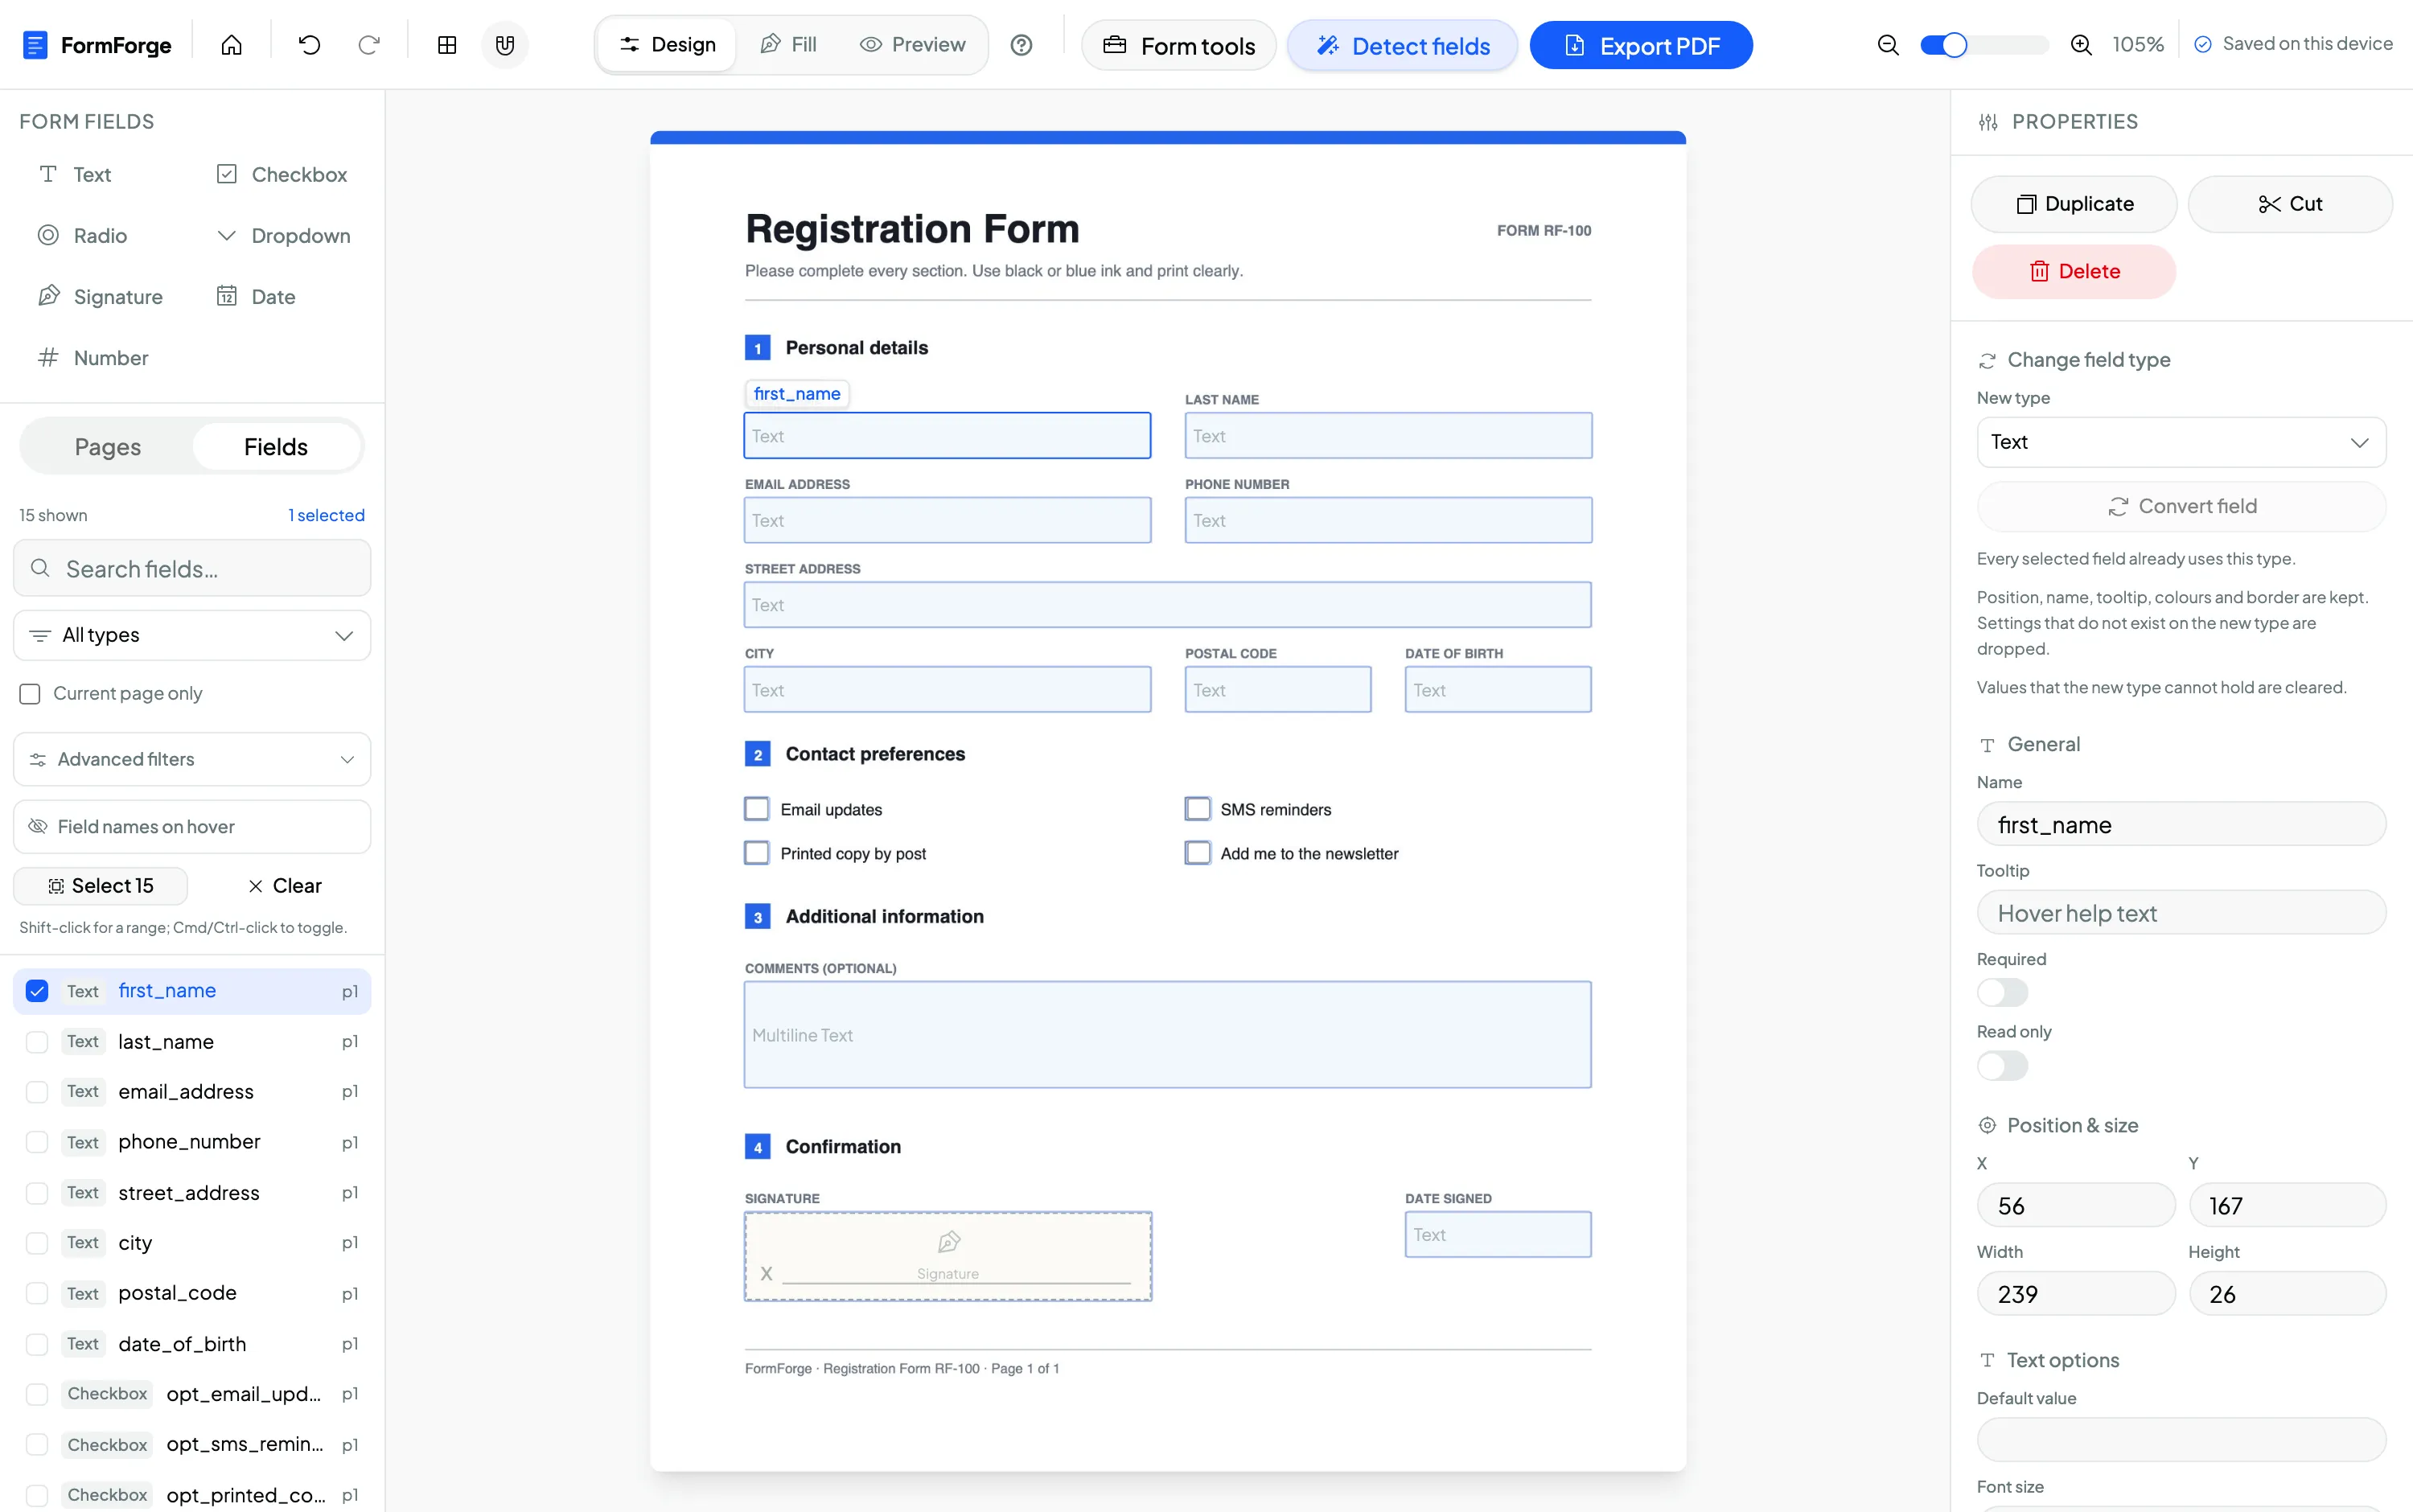
Making a PDF fillable takes five steps and no installed software: open the PDF in a browser-based editor, draw the fields you need onto the page, set each field’s properties, preview it, and export. The result is a standard fillable PDF that opens in Adobe Reader, Preview and any browser — done in about five minutes, entirely on your own device.
The rest of this guide walks through each step with screenshots from FormForge, a free tool that runs client-side so your file never gets uploaded. If you already know the theory, jump straight in:
What makes a PDF “fillable”?
A fillable PDF contains interactive form fields — clickable text boxes, checkboxes, radio buttons, dropdowns and signature areas layered on top of the page. Under the hood these fields follow the AcroForm standard, the form format built into the PDF specification that Adobe Reader, Acrobat, macOS Preview, Chrome and Firefox all understand. When you send a fillable PDF, the recipient types directly into it instead of printing, hand-writing and scanning it back.
A “flat” PDF, by contrast, is essentially a picture of a page. There’s nowhere to type — you can only annotate it with a separate tool, which most people never do correctly. The whole job of a form editor is to add that interactive AcroForm layer without touching the underlying page design.
There’s a second, older form format called XFA that Adobe once pushed, but it’s poorly supported outside Adobe’s own software and is effectively deprecated. For a form that “just works” everywhere, you want AcroForm — the difference is worth understanding, and we cover it in AcroForm vs XFA. Everything below produces AcroForm fields.
Step 1 — Open your PDF in the editor
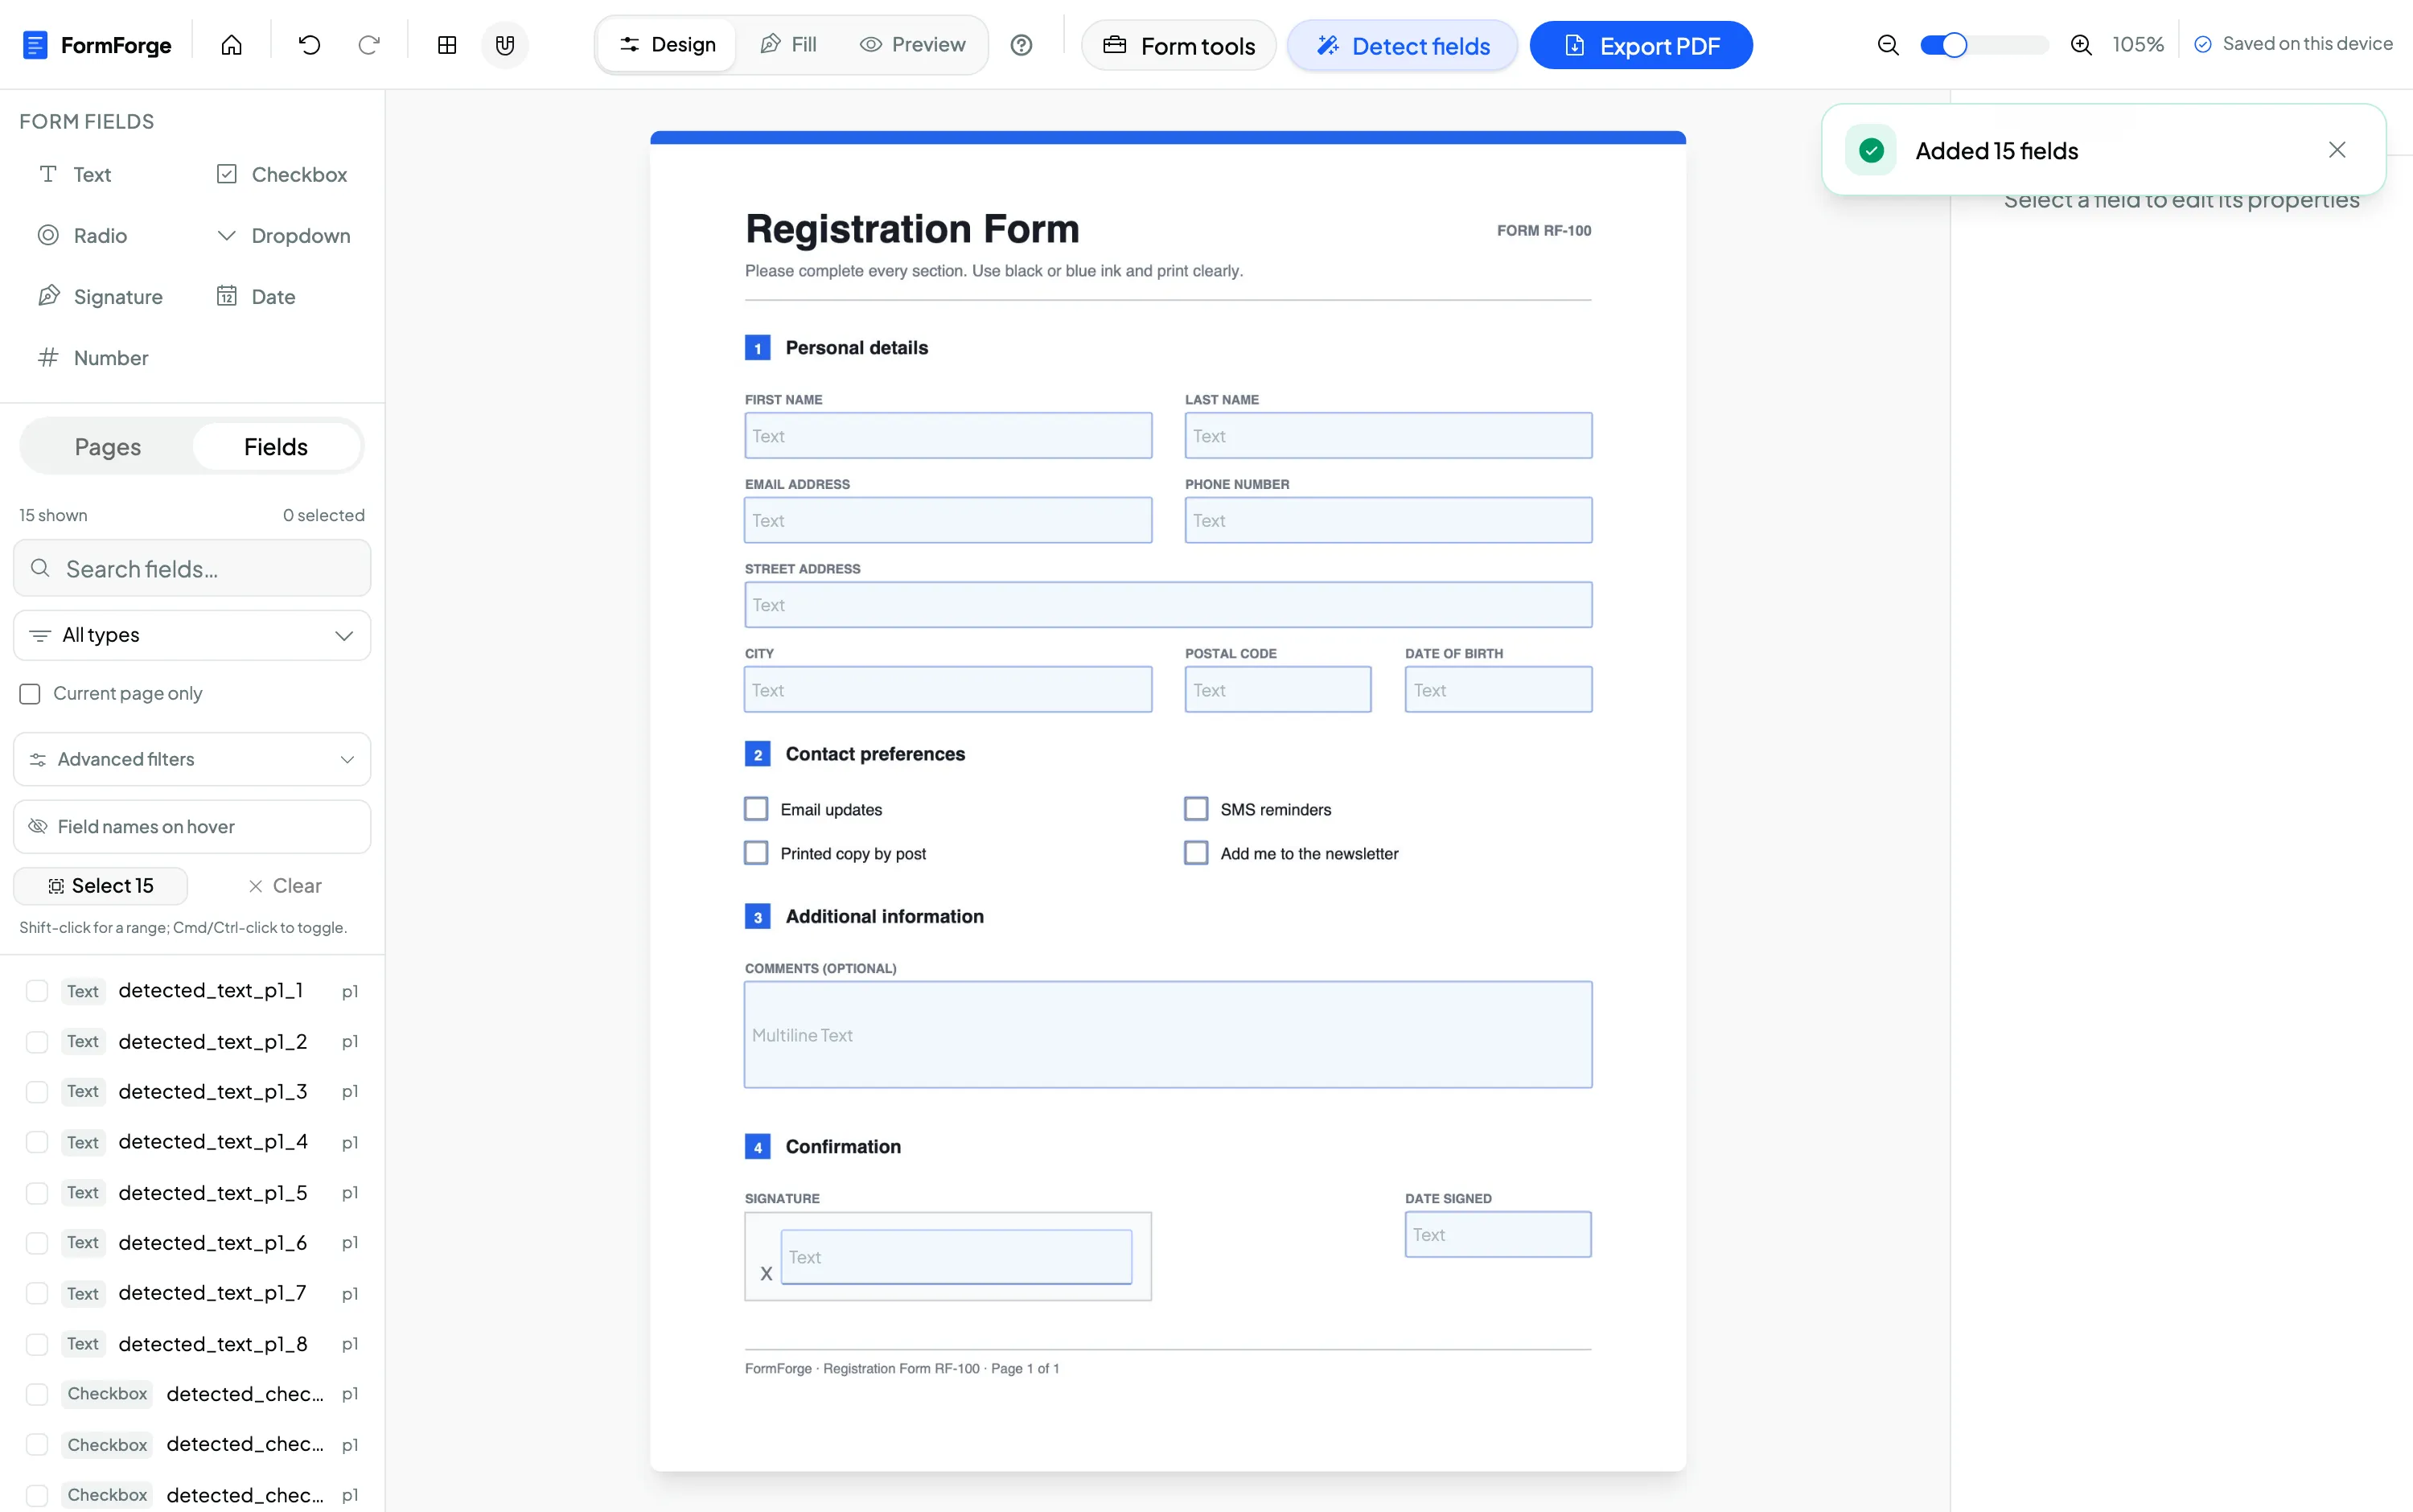
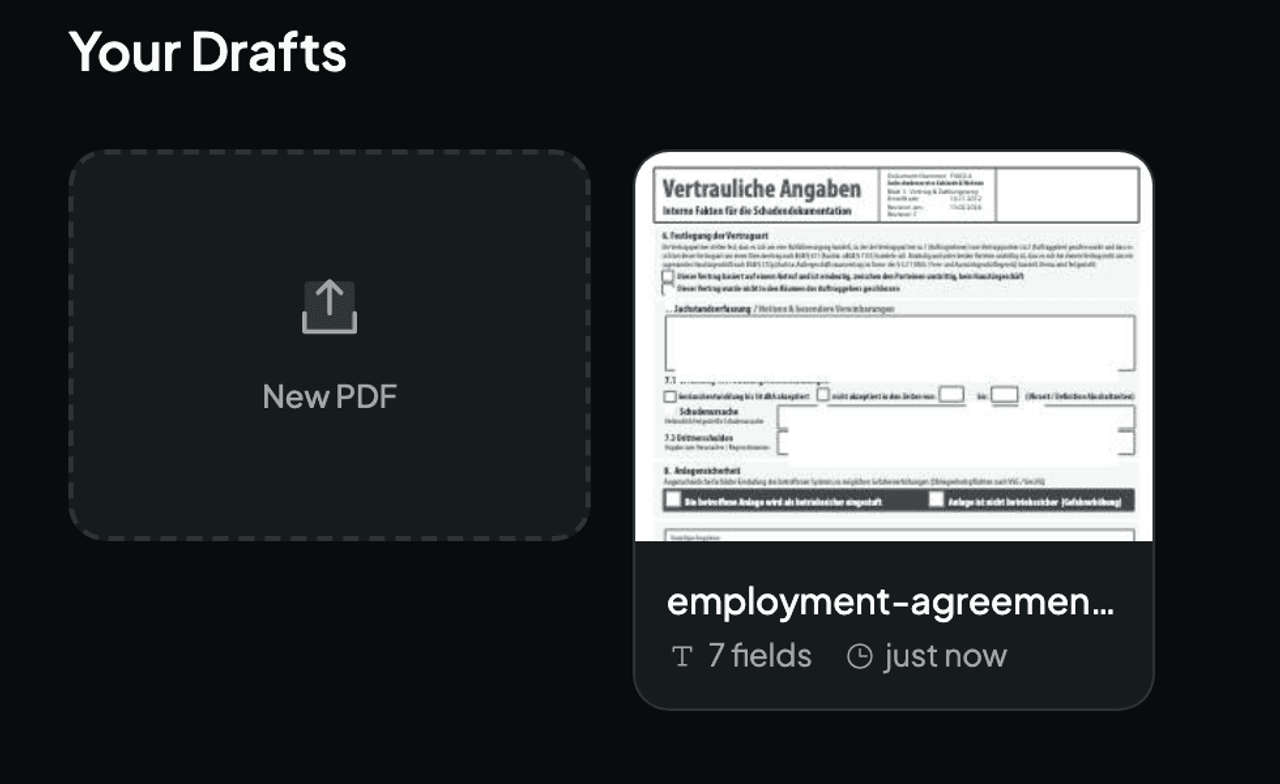
Open the editor and drag your PDF onto the canvas, or click to browse for a file. The document is parsed locally by your browser — open the network tab in your developer tools and you’ll see that nothing is uploaded. If the PDF already contains form fields (many downloaded government and HR templates do), FormForge detects and imports them so you can edit rather than start over.
Starting from a Word document instead? Export it to PDF first (File → Save As → PDF), then import that file. There’s a dedicated walkthrough for that route in Create a fillable PDF from Word.
Step 2 — Add your form fields
With the PDF loaded, pick a field type from the Form Fields toolbar on the left and draw it where it belongs on the page. Each field snaps into place and can be moved, resized or duplicated afterwards.
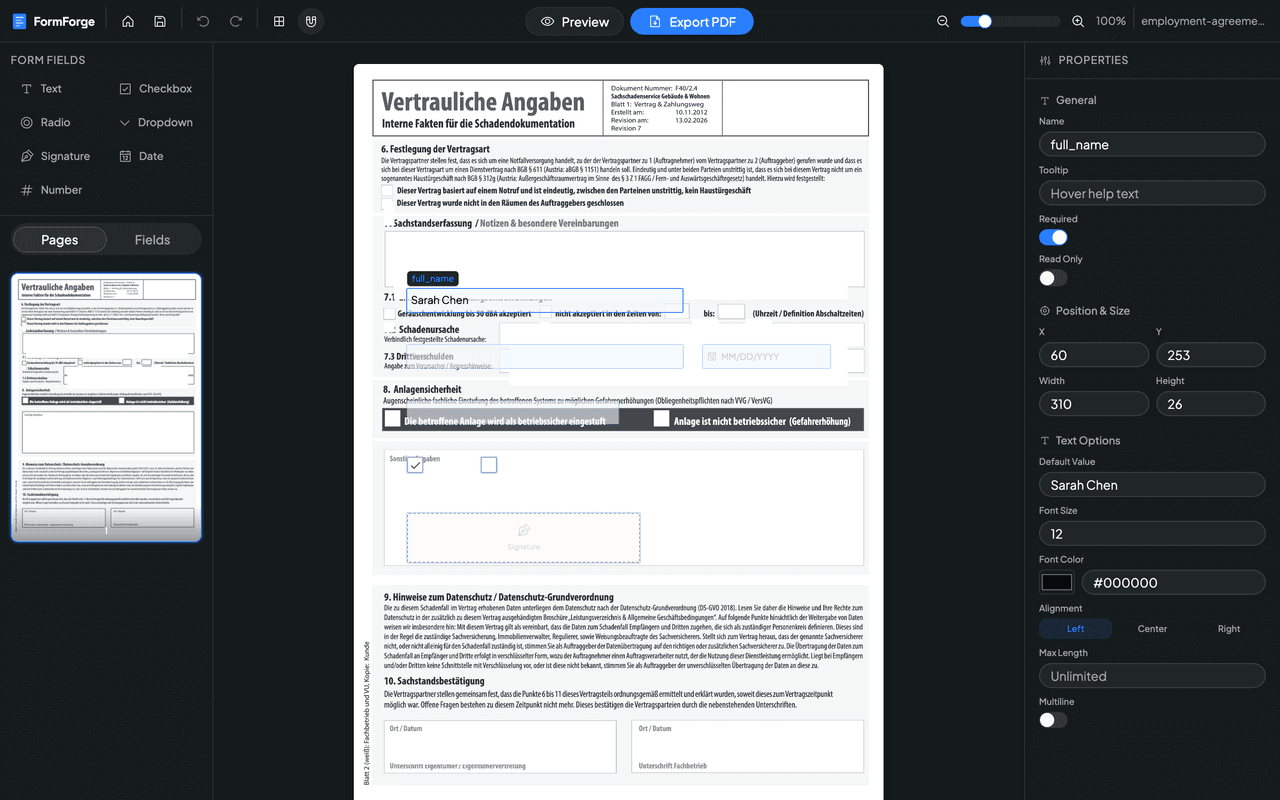
Give every field a clear, descriptive name — this is what appears in the exported form data, so full_name is far more useful than field1 when you (or a system) later read the responses. Good names matter most for software teams who process submitted PDFs programmatically.
The field types you can add
FormForge supports the seven field types that cover almost every real-world form:
- Text — names, addresses, reference numbers and free-text answers. Can be single-line or multiline.
- Checkbox — yes/no answers and multi-select options. See adding checkboxes to a PDF form for grouping tips.
- Radio — “pick exactly one” groups, such as a rating or a payment method.
- Dropdown — a compact list of predefined choices, ideal for departments, countries or statuses.
- Signature — a reusable signature area; the deep-dive is in add a signature field to a PDF.
- Date — a formatted date field for deadlines, birthdays and effective dates.
- Number — numeric-only input for amounts, quantities and ages.
Mixing these is where forms come to life: a legal intake form might pair text fields with a signature and a couple of checkboxes, while a government benefits application leans on dropdowns and radio groups to keep answers consistent.
Step 3 — Configure each field’s properties
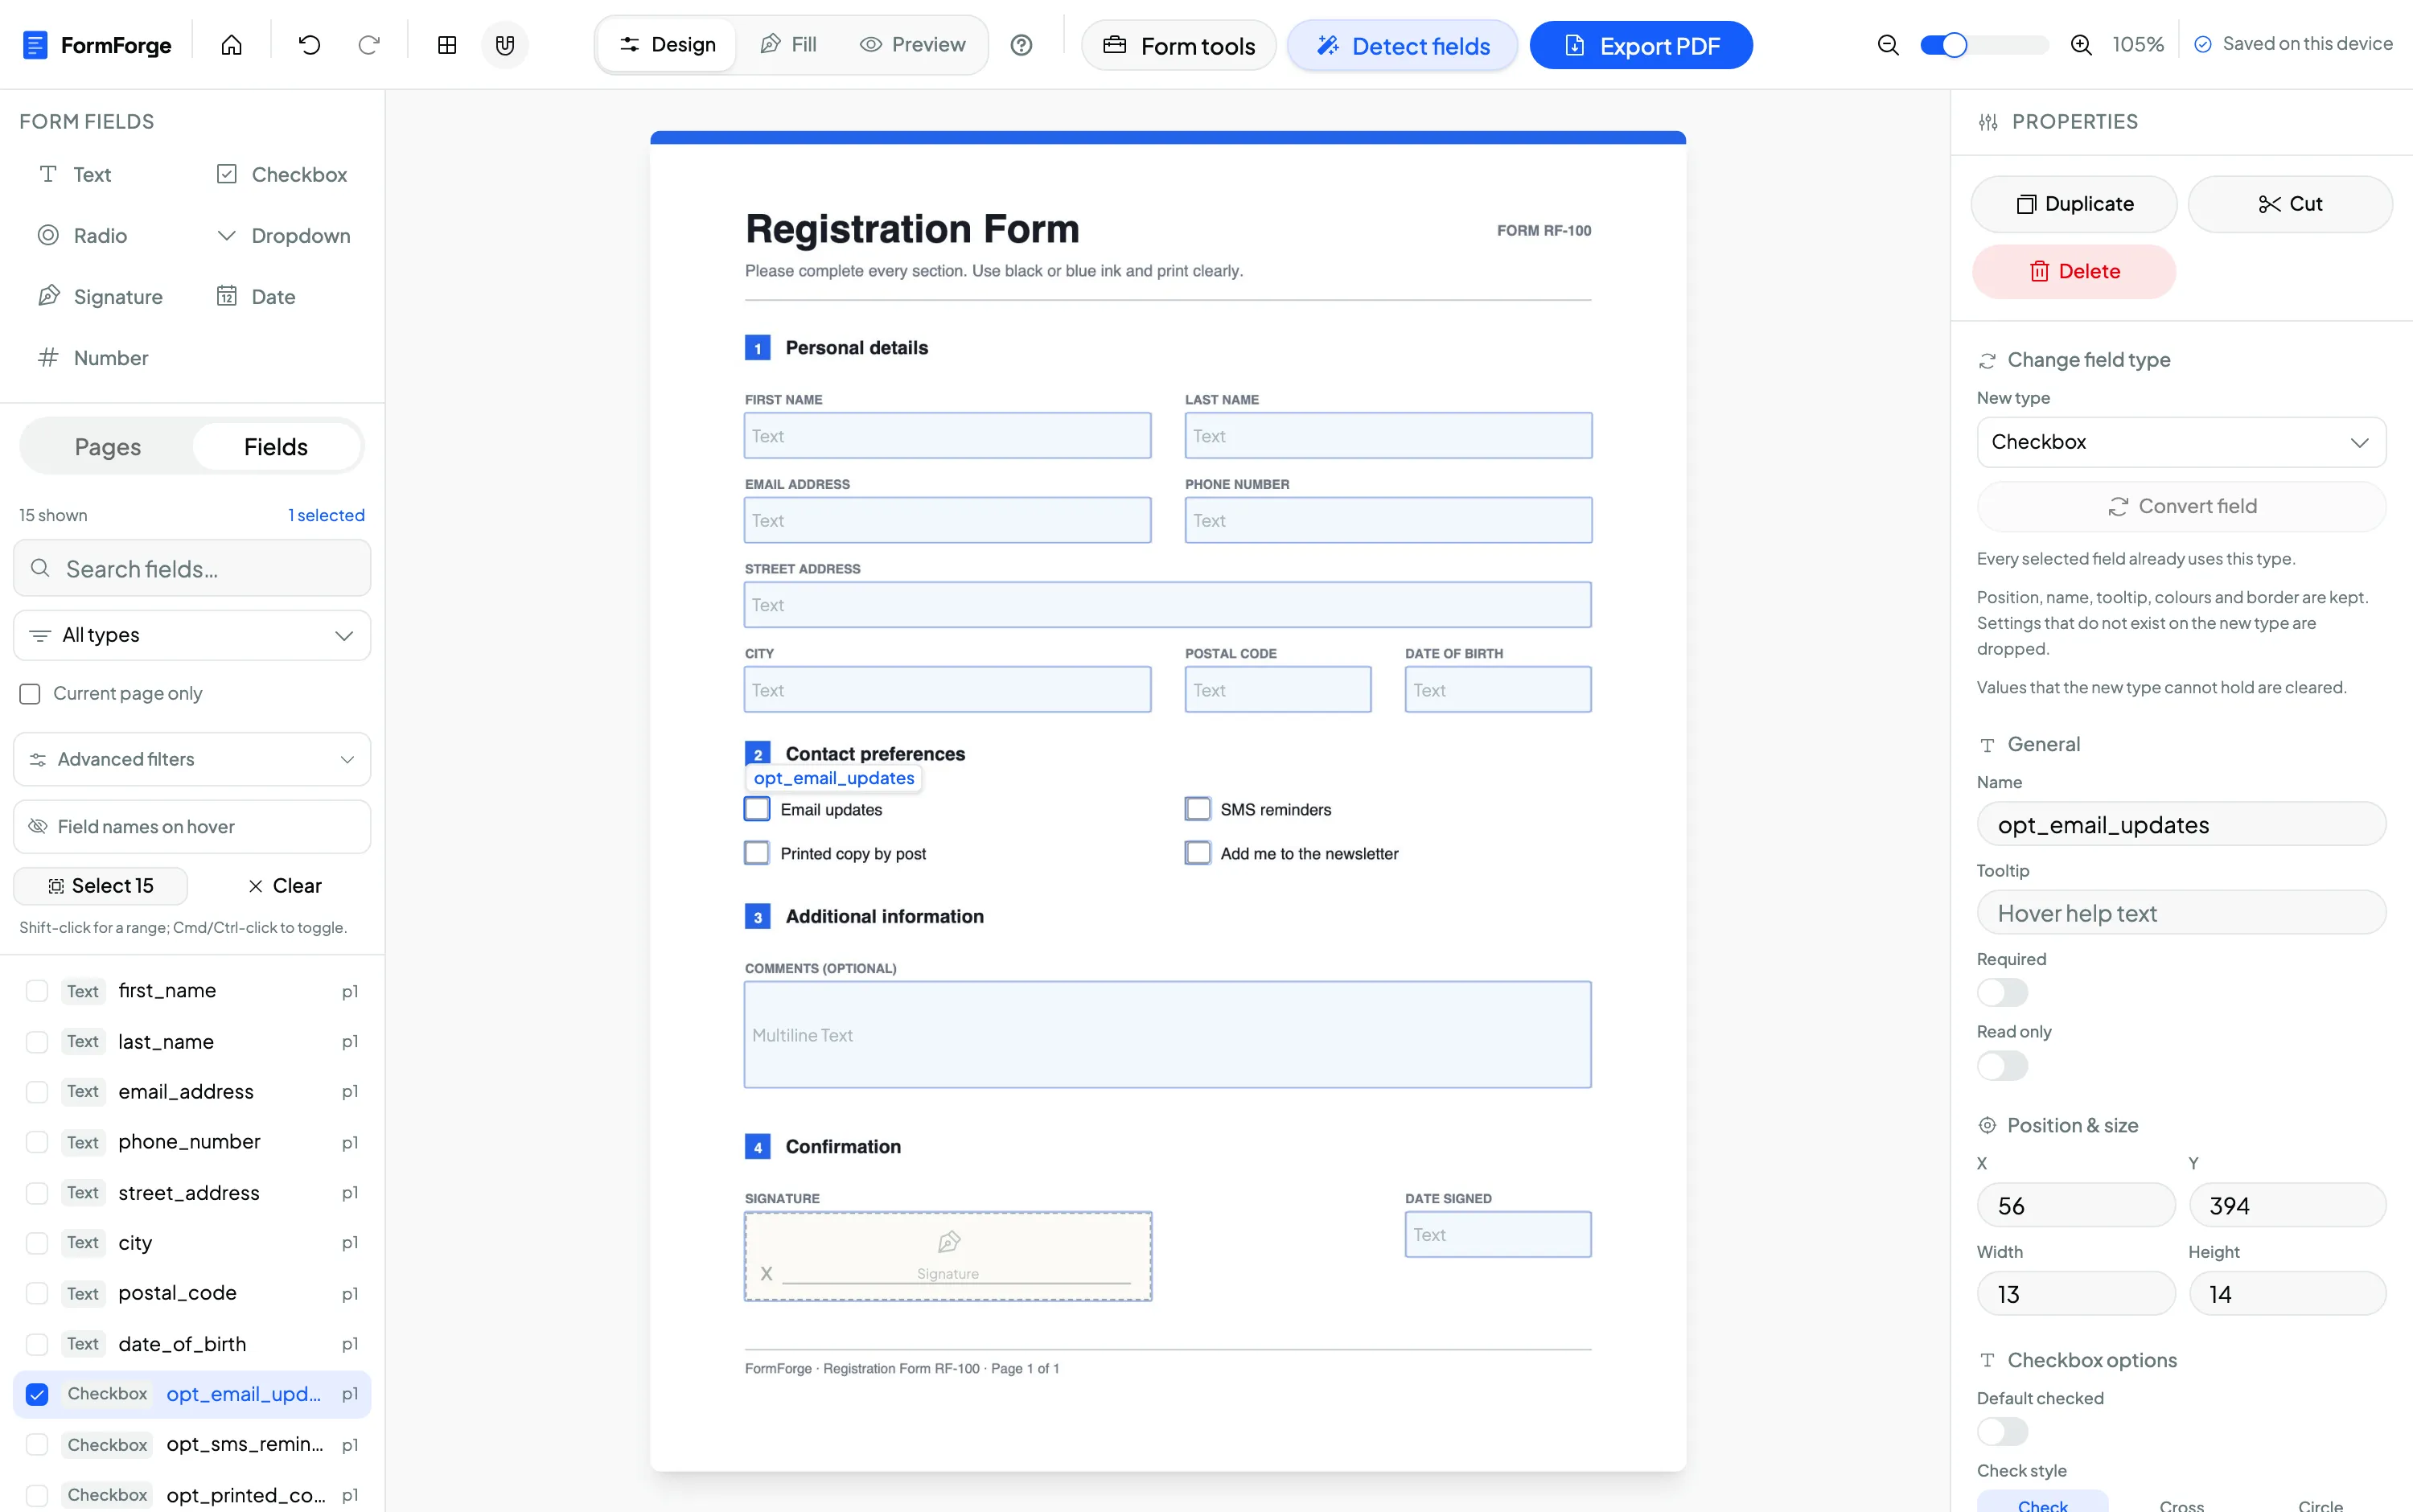
Select any field and the Properties panel on the right lets you fine-tune it. This is the difference between a form that looks right and one that actually collects clean data.
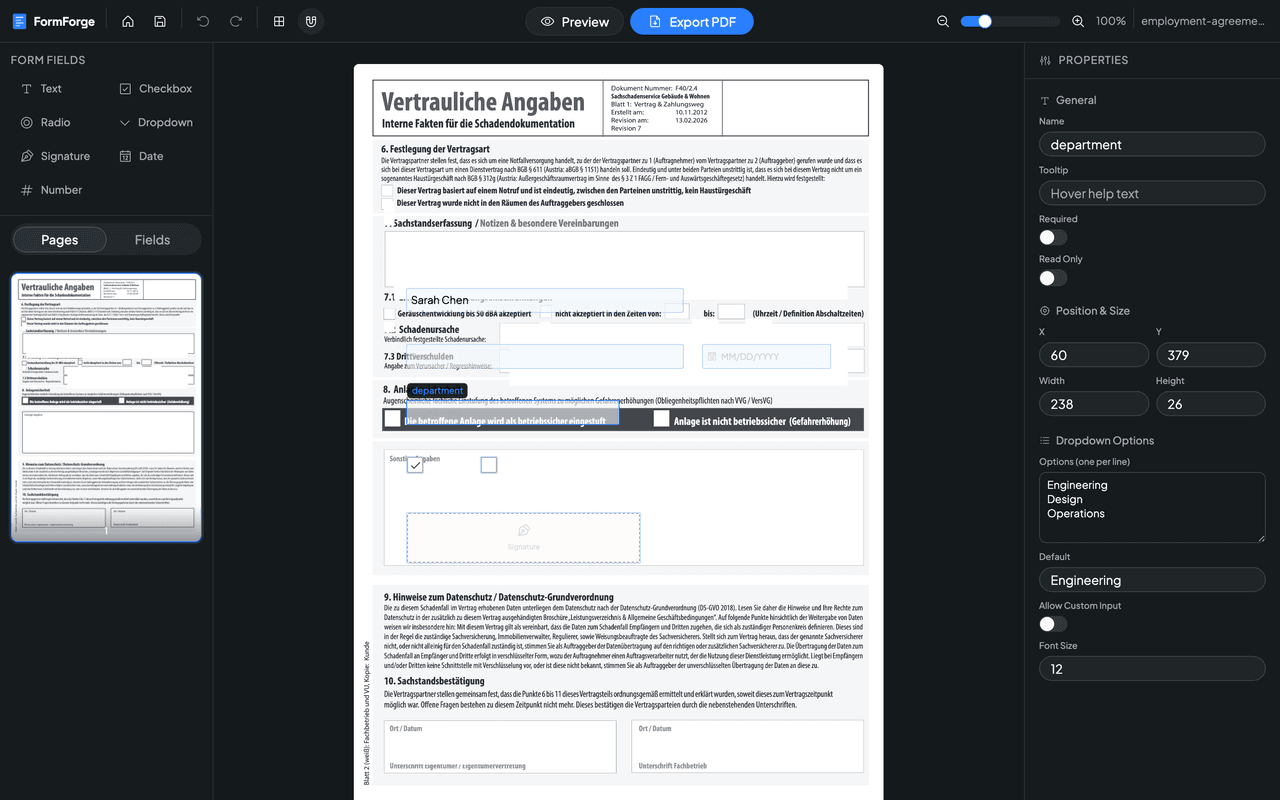
The settings you’ll reach for most often:
- Required — mark the fields a recipient can’t skip.
- Tooltip — a short hint that appears on hover, useful for explaining a reference-number format.
- Position & size — type exact X/Y coordinates and dimensions, or drag the handles and nudge with the arrow keys for pixel-perfect alignment.
- Default value & formatting — set a starting value, font size, colour and alignment.
- Options — for dropdowns and radio groups, list one choice per line and pick a default.
Careful field setup is exactly why HR teams and freelancers and small businesses reach for a real editor rather than scribbling on a printout — required fields and tidy dropdowns mean fewer half-finished forms coming back.
Step 4 — Preview your form
Before you send anything, switch to preview mode and fill the form in exactly as your recipient will. Type into the text fields, tick the checkboxes, open the dropdowns and check the tab order. Because preview uses the same AcroForm layer you’re about to export, what you see here is what your recipient gets.
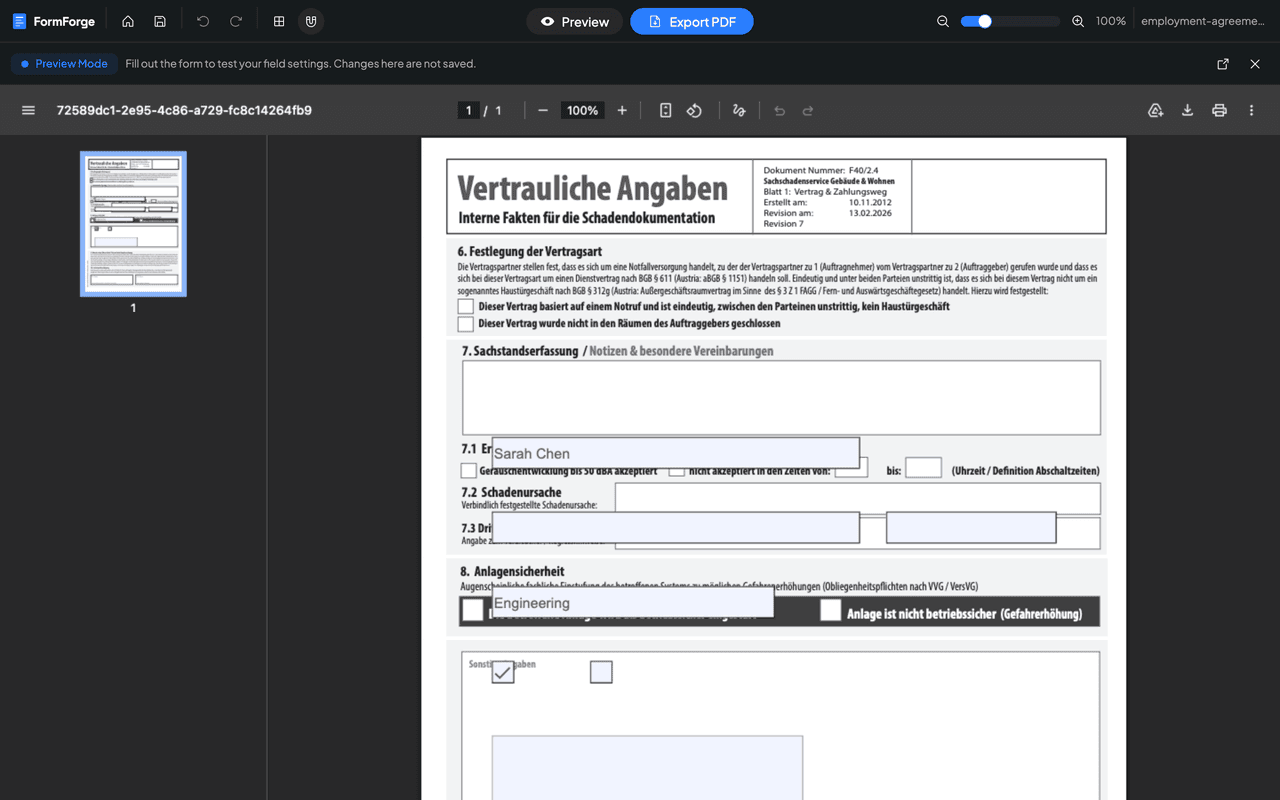
If a field is in the wrong place or the wrong size, go back, adjust it, and preview again. This loop takes seconds and catches the small alignment issues that make a form look unprofessional.
Step 5 — Export a fillable PDF
Happy with it? Click Export PDF. FormForge writes proper AcroForm fields into the document and downloads a standard fillable PDF.
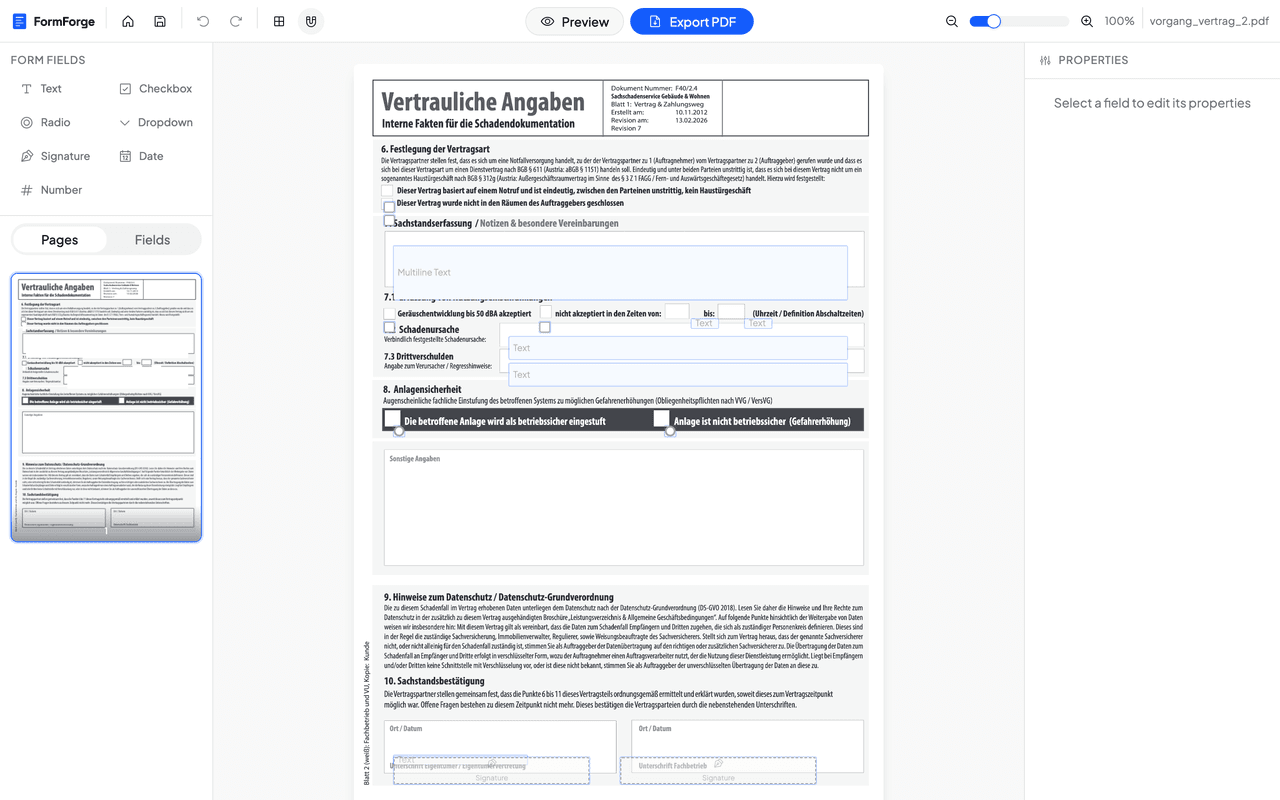
That file opens correctly in Adobe Reader, Acrobat, macOS Preview, Chrome, Firefox and virtually every mobile PDF viewer — recipients fill it in and save it without any special software. And because every step happened in your browser, the document never left your computer. That’s a fillable PDF, made for free, with nothing installed.
When you’d still want Acrobat or another tool
Being honest about the limits matters more than a sales pitch. A browser-based editor like FormForge is the right choice for the everyday job of turning a PDF into a fillable form quickly and privately. But there are cases where you’d reach for something else:
- Calculated fields and complex JavaScript. If you need cells that auto-total, cascading validation or scripted logic across fields, Adobe Acrobat Pro’s forms engine goes further than most free tools.
- Verified signer identity and audit trails. FormForge can seal an export with a certificate-based digital signature, and a signature field gives someone a visible place to sign. Proving who signed to a recipient who has never seen your certificate, and keeping an evidence log of the exchange, is a job for dedicated e-signature platforms like DocuSign or Adobe Sign.
- Bulk, automated generation. If you’re producing thousands of forms from a data source, a server-side library (or our developer workflow) will beat any point-and-click editor.
- Editing the page content itself. Form editors add an interactive layer; they don’t rewrite the underlying text or graphics. For that you need a full PDF editor.
For the ordinary “I just need this PDF to be fillable” task, though, none of that is necessary. If you’re weighing options, we compare the honest trade-offs in the best free fillable PDF form creators and in how to make a PDF fillable without Acrobat.
Frequently asked questions
Do I need Adobe Acrobat to make a PDF fillable?
No. Acrobat is one way to add form fields, but it’s a paid subscription. FormForge adds the same standard AcroForm fields for free in your browser, and the exported file opens in Acrobat, Adobe Reader, macOS Preview and every major browser.
Is it free to create a fillable PDF with FormForge?
Yes — creating and exporting fillable PDFs with FormForge is free, with no account required. The work happens entirely in your browser, so there are no server costs to pass on.
Are my documents uploaded to a server?
No. All processing is client-side, so your PDF and anything you type into it never leave your device. You can confirm this yourself by opening your browser’s network tab while you work — no file is uploaded. That’s why it’s trusted for sensitive HR and legal paperwork.
Will the exported form work in Adobe Reader and on mobile?
Yes. FormForge exports standard AcroForm fields, which are supported by Adobe Reader, Acrobat, macOS Preview, Chrome, Firefox and most mobile PDF viewers. Recipients can fill the form and save it without any special software.
Can I turn a scanned paper document into a fillable form?
Yes, as long as the scan is saved as a PDF. Import the scanned PDF and draw fields on top of it. The scan stays as the background image and the fields you add become the interactive layer people type into.
Next steps
Now that you’ve built your first form, these focused guides go deeper:
- Make a PDF fillable without Acrobat
- Add a signature field to a PDF
- Add checkboxes to a PDF form
- Create a fillable PDF from Word
Or just open the editor and build your form now.
Build your fillable PDF now — free
Import any PDF, drag on the fields you need, and export an Adobe-ready form. It runs entirely in your browser — no uploads, no account.
Try FormForge Free